HOW TO APPLY TO GOOGLE ADSENSE AND ACTUALLY GET APPROVED
I first applied to Google Adsense back in 2019. Since that time, I have applied and gotten approved many times for related business entities and helped others set up their own Google Adsense accounts. Each time, my applications have been approved to start using the Google Adsense program, so I feel like I can offer some solid advice on how to apply for Google Adsense and get approved.
Now, if you have been following my blog, you know that I had a bit of a set back with Google Adsense, but I am now actively using Google Adsense as though nothing happened. The reality is that Google Adsense is the best contextual marketing program on the market with the most advertisers and the highest payouts. I love the Adsense program and definitely recommend those involved with to at least get started with Adsense.There are other options available once you get over a certain amount of pageviews, but Adsense is a fantastic way to earn extra income, especially if you are just starting out. Let’s take a look at the steps you’ll need to take to get that Google Adsense aproval, as well as some other alternatives you might consider if you already get lots of traffic.
HOW TO GET GOOGLE ADSENSE APPROVAL?
Google wants to know that you have a valuable resource! So, in order to increase your chances of approval, you need to create original, articulate, and useful content! You should never aim to just throw up some spammy content that’s not useful. This will just irritate readers and your site won’t rank as well in search engines.
You want to make sure your content is extremely valuable so that you can get an Adsense approval. But this is also important because search engines only rank “worthy” content. Your content will get the viewers it deserves. If it’s no good, don’t expect a lot of Google love.
My advice is to have at least 10 well-written articles of 1000 words or more each on your site before applying. In addition, I would have a great “About Page”, “Contact” page, and a “Privacy Policy” page. The privacy policy needs to include this information supplied by Google here. You can find a free privacy policy generator that I have used right here.
Finally, to give your site an extra boost on the “look” score, I recommend having a logo designed. You can do it yourself, or you can hire someone on Fiverr.com if you are cheap (like me). For $5 – $20 you can take a generic theme and make it look much nicer with a custom logo.
To really bring out the inner beauty in your site, you will need a theme and page builder. These can be super easy to use and pretty inexpensive. I used to love Thrive Themes, but now I’m a big fan of Elementor. Elementor saves you the stress of fooling with your theme options and limited customization abilities. You can build beautiful pages and turn your visitors into money.
HOW TO APPLY FOR GOOGLE ADSENSE
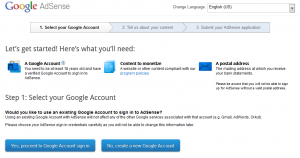
You can apply online to Google Adsense right here. Here you will supply your website URL, Individual name or Business Entity, contact name (you if applying for yourself; could be someone different if you are applying as a business entity), mailing address, phone number, email address, and perhaps one other basic bit of information. You are not required to submit your TIN or bank account information at this stage yet. This will happen after you get approved.

Make sure to give accurate phone and physical address information. You will be REQUIRED to verify your phone number and they will mail you a PIN to the physical address you supplied. However, this does not occur until step 4.
The online application itself only takes a few minutes to fill out.
GET TEMPORARILY APPROVED AND PLACE ADS
Adsense approval usually occurs within 24 to 48 hours now. If you follow my steps above for creating a unique site that has never been involved with Google Adsense before, you should have no issues getting approved quickly.
At that point, you will receive an approval email from Google that explains the process. Essentially you are “temporarily” approved until you meet other verification steps.
This means you can start placing ads on your site and you will see the clicks and revenue coming into your account. Google is simply monitoring your activity to make sure you are not clicking your own ads or sending suspicious traffic. As long as you leave your ads alone and don’t do anything suspicious – you should be fine.
You can temporarily place Adsense ads on your site using the code that Google provides you in your ads dashboard.
In addition, you can also add the Google Adsense code to ANY of your other websites! You don’t have to apply for each new site – you can start placing Adsense ads on all of your sites once you have an approval. Once you have any approved account, you can use the same Adsense code on all your sites, but you should definitely create new ad units and color themes for each ad that you place on different sites. You want to make sure your ads match the coloring of your site and your brand.
HOW TO GET GOOGLE ADSENSE VERIFIED: PIN VERIFICATION, BANK ACCOUNT AND TAX INFORMATION, PHONE NUMBER
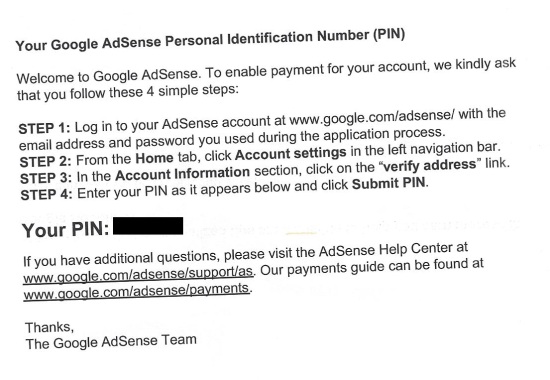
However, before you get paid, you need to verify a few things. First, Google will send you a PIN verification in the mail. This will come after a week to 10 days usually.

There is no rush, but at some point you will need to verify your bank account and submit your tax information. The bank account must be in the same name that you applied with. (So, if you applied with your business entity, the bank account must be for the business entity).
To get paid by ACH (the best way), you need to supply your bank account number and routing number. Then Google will do a test deposit of a few cents. You will then input this amount in your Google Adsense account to finish the verification. Then you can start getting paid monthly!
You will also need to supply your TIN number and complete the necessary tax documents (this is all handled online by Google and only takes a couple of minutes).
If you haven’t previously verified your phone number, you will need to do so. Google will place a test call with an automated code to you. Input the code, and you are good to go!
CAN I GET APPROVED ON A “BLOGGER” WEBSITE?
Yes! You can apply using a site with a subdomain and get approved for Adsense on blogger. I would however caution against this. It costs so little these days to setup a custom domain and customize your own website, that you should always consider moving away from “blogger” type platforms and host your website with a reputable hosting company.
Yes. You need to be sure that there are no parts of your website that would stretch over your ads and cause intentional clicks. Google looks at this as fraudulent clicks, which means that it can lead to getting your adsense account banned. I’ve had that happen to me in the past for having my ad placement be too aggressive. Make sure you don’t follow in my footsteps.
WHAT EMAIL ADDRESS SHOULD I USE TO APPLY?
This doesn’t really matter. You can always just apply for a new Gmail address to apply for Adsense approval. You’ll login with that email address when running your ads and checking on your Adsense earnings.
WHAT CAN I EXPECT TO MAKE IN REGARDS TO ADSENSE EARNINGS?
This is entirely click depending on your average CPC ( advertiser cost per click). It will also vary by traffic. Some people make a full-time income strictly from Adsense display ads.
There are a number of Adsense alternatives. If you have steady traffic, I’d highly recommend you look into some type of media partner that partners with Google to manage your ads. There are a number of these companies out there right now – specifically AdThrive (requires 100k pageviews), Media Vine (requires 50k page views) or Ezoic. These companies work with Google and other advertising partners to sell ad space on your sites.
They usually pay out by RPM (per 1000 visits) and end up paying more on a monthly basis then Adsense. The downside is that you need traffic to apply.


why GOOGLE ADSENSE of my web is not approving? any idea?
ReplyDeleteThis comment has been removed by the author.
ReplyDeleteThis comment has been removed by the author.
ReplyDeleteThis was honestly one of the most helpful guides I’ve come across about Google AdSense approval! I’ve been struggling to get approved and didn’t realize how important it is to have original content and proper pages like Privacy Policy and About Us. The temporary approval and PIN verification steps were explained really clearly too. Thanks for breaking it down so well — super valuable for beginners like me!let me more update https://thespikegamepro.com
ReplyDeleteGreat breakdown! I didn’t know you could start placing ads right after temporary approval — that’s a game changer. Also, the tip about having at least 10 quality articles before applying really makes sense now. I’ve been rejected once before, but after reading this, I think I know what went wrong. Appreciate the clear advice!https://Inatbox-apkindir.com.tr
ReplyDeleteThanks for the clear steps! A solid guide like this really helps new bloggers avoid common mistakes. While researching digital setups, I also found this web resource helpful for understanding official processes in the Philippines. Sharing in case it helps someone else too.
ReplyDeleteIf your site is about police clearance or barangay clearance barangay clearance Google AdSense may reject it if the content is too thin or missing pages like Privacy Policy, About, or Contact.
ReplyDelete